- Whatsapp: 8613738300923
- Email: [email protected]


Sanitary diaphragm valve leakage is a common concern in food and beverage processing, pharmaceutical manufacturing, biotechnology, and other industries that require hygienic fluid handling. Even a small leak can cause product loss, interrupt production, increase maintenance costs, and create potential contamination risks.
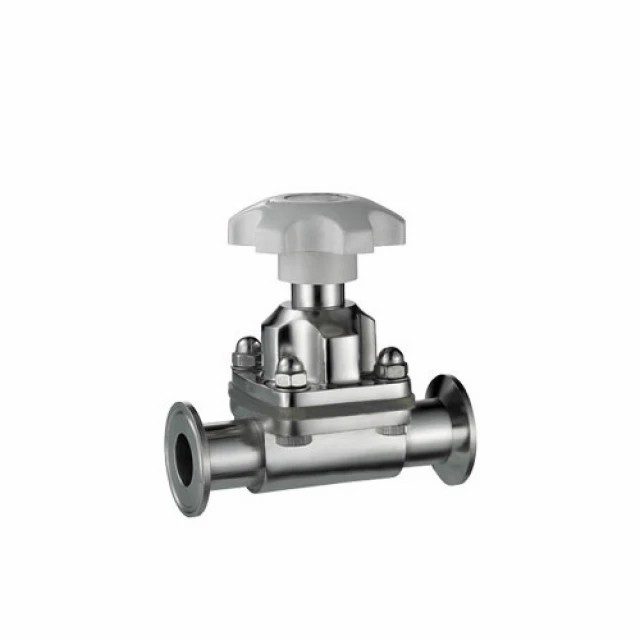
A sanitary diaphragm valve uses a flexible diaphragm to control fluid flow and separate the process medium from the valve’s operating mechanism. Although this design helps support hygienic operation, the diaphragm and other sealing components can deteriorate over time because of chemical exposure, temperature fluctuations, pressure changes, improper installation, or repeated operating cycles.
Understanding the causes of sanitary diaphragm valve leakage is essential for identifying the correct repair method and preventing recurring problems. This guide explains common leakage types, their causes, troubleshooting procedures, and practical maintenance measures to help keep sanitary valve systems operating reliably.
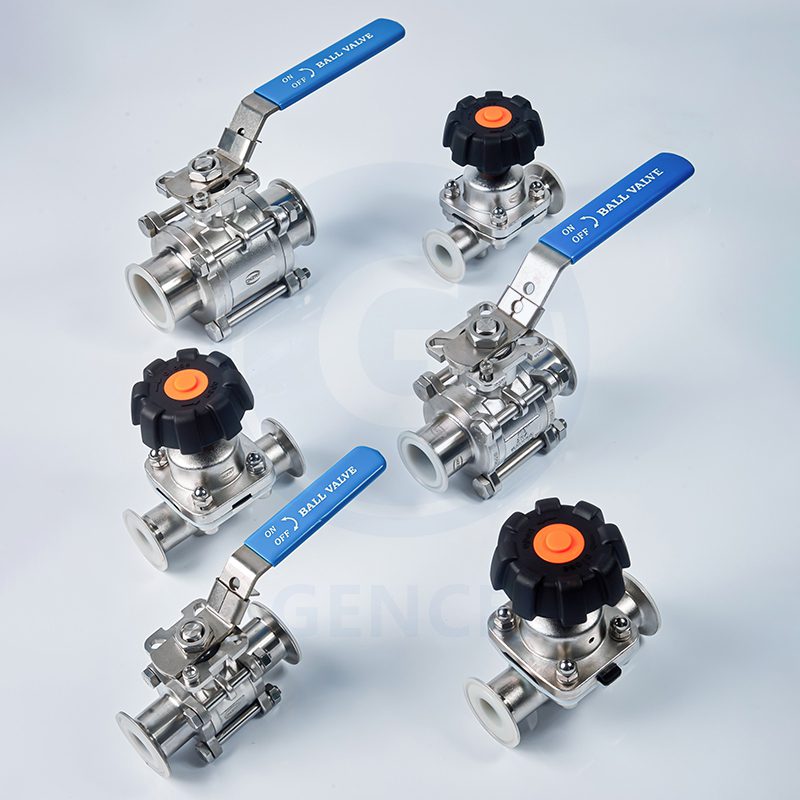
Sanitary diaphragm valve leakage generally falls into two categories: internal leakage and external leakage.
Internal leakage occurs when the valve fails to stop fluid flow completely in the closed position. Liquid continues passing through the valve because the diaphragm cannot form an effective seal against the designated sealing area.
External leakage occurs when fluid escapes from the valve assembly or its connections. Depending on the valve design, potential leakage points include body connections, gaskets, and damaged components that allow process fluid to escape outside the valve.
In hygienic processing environments, both types of leakage require prompt investigation. Internal leakage may affect process control and product quality, while external leakage can create safety, sanitation, and equipment-damage concerns.
The diaphragm is the primary sealing component in a sanitary diaphragm valve. During operation, it repeatedly flexes as the valve opens and closes. Over time, this movement can cause fatigue, deformation, cracking, or surface damage.
Chemical incompatibility can accelerate deterioration, particularly when the diaphragm is exposed to aggressive process fluids or cleaning agents. Excessive operating temperatures, pressure fluctuations, and frequent cycling can also shorten its service life.
How to fix it:
Isolate the valve, depressurize the system, and remove the diaphragm according to the manufacturer’s maintenance instructions. Inspect it for cracks, swelling, hardening, tears, permanent deformation, or other visible damage. Replace a defective diaphragm with a compatible part designed for the specific valve model.
When selecting a replacement, verify the material, size, temperature range, pressure limits, and compatibility with both the process medium and cleaning chemicals.
A diaphragm may appear intact but still fail to seal properly if its material is unsuitable for the operating conditions. Different elastomers and engineered materials have different chemical resistance, flexibility, temperature limits, and mechanical properties.
For example, EPDM is commonly used in water and selected hygienic applications, while PTFE offers broad chemical resistance. However, neither material is universally suitable for every fluid or operating condition.
Incompatible materials may swell, harden, lose elasticity, or deteriorate prematurely, resulting in leakage.
How to fix it:
Review the process fluid, concentration, operating temperature, pressure, and cleaning procedure. Confirm the material compatibility with the valve manufacturer before installing a replacement diaphragm.
For applications involving aggressive chemicals, high temperatures, or frequent clean-in-place (CIP) cycles, evaluate the complete operating conditions rather than choosing a diaphragm based on material name alone.
The diaphragm must contact the valve’s designated sealing area to stop fluid flow. Product residue, solid particles, deposits, or surface damage can interfere with this contact and create a leakage path.
This problem may occur when processing liquids containing suspended solids or when cleaning procedures fail to remove deposits completely. Scratches, corrosion, or deformation of the sealing area can also prevent effective shutoff.
How to fix it:
Inspect the sealing area and remove compatible deposits using the approved cleaning procedure. Avoid abrasive tools or aggressive cleaning methods that could damage product-contact surfaces.
If the sealing area is scratched, corroded, or deformed, consult the manufacturer to determine whether the affected component can be repaired or must be replaced. Replacing the diaphragm alone may not resolve leakage caused by a damaged valve body.
Incorrect assembly can prevent the diaphragm from seating evenly or operating through its intended range. Problems may arise from using an incompatible replacement part, incorrect component positioning, uneven tightening, or failure to follow the manufacturer’s assembly sequence.
Overtightening can also damage components or place unnecessary stress on the diaphragm and operating mechanism.
How to fix it:
Disassemble and inspect the valve in accordance with the manufacturer’s instructions. Verify that the diaphragm is the correct model and is installed in the proper orientation. Check the condition and position of the relevant sealing components, and reassemble the valve using the specified procedure and tightening requirements.
After assembly, perform an appropriate leak test before returning the valve to normal production service.
Every sanitary diaphragm valve has specified operating limits. Excessive pressure, pressure surges, or temperatures beyond the diaphragm’s rated range can deform or damage the sealing component.
High temperatures may accelerate material aging, while excessive pressure can increase mechanical stress. Sudden changes in operating conditions may further reduce diaphragm service life.
How to fix it:
Compare actual operating conditions with the valve’s rated limits. Check for pressure spikes, unexpected temperature changes, and operating conditions that exceed the specifications of the installed diaphragm.
If the existing valve is unsuitable, consider a model or diaphragm material designed for the required conditions. The allowable pressure and temperature must be verified for the complete valve assembly, including the body and diaphragm.
External leakage may occur at body joints, piping connections, or other sealed interfaces, depending on the valve construction. Common causes include damaged gaskets, incompatible sealing materials, incorrect assembly, and connection misalignment.
A damaged gasket may no longer provide sufficient sealing pressure, while a misaligned connection can place additional stress on the joint.
How to fix it:
Identify the exact leakage point before disassembling the valve. Inspect the relevant gasket and connection surfaces for damage, contamination, or misalignment. Replace defective sealing components with compatible parts and reassemble the connection according to the manufacturer’s requirements.
Do not assume that every external leak originates from the diaphragm. Identifying the actual source helps prevent unnecessary component replacement.
Manual diaphragm valves rely on a mechanical operating mechanism to move the diaphragm into the required position. Applying excessive force to the handwheel can place unnecessary stress on the diaphragm and related components.
In some cases, leakage may also result from incomplete closure, worn operating components, or a mechanism that no longer moves the diaphragm correctly.
How to fix it:
Operate the valve according to the manufacturer’s instructions and avoid using tools to force the handwheel beyond its intended operating range. Inspect the stem, operating mechanism, and diaphragm assembly for wear or damage.
If the valve cannot close fully under normal operating force, investigate the cause instead of repeatedly tightening the handwheel. The problem may involve internal obstruction, incorrect assembly, component wear, or an unsuitable operating condition.
A systematic troubleshooting process can help maintenance teams locate the source of leakage and avoid unnecessary repairs.
Step 1: Identify the Leakage Location
Determine whether fluid is passing through the valve while it is closed or escaping externally from the assembly or connection. Record the operating conditions when the leak occurs, including pressure, temperature, fluid type, and valve position.
Step 2: Make the System Safe
Before inspecting or disassembling the valve, isolate it from the process, release stored pressure, drain the relevant section, and follow the site’s lockout and safety procedures. Hazardous or corrosive fluids may require additional protective measures and decontamination.
Never loosen a pressurized valve assembly to investigate a leak.
Step 3: Inspect the Relevant Components
For internal leakage, inspect the diaphragm, sealing area, and operating mechanism. For external leakage, examine the applicable gaskets, joints, and connection surfaces. Look for visible damage, residue, corrosion, incorrect assembly, or signs of material deterioration.
Step 4: Verify Material and Operating Compatibility
Confirm that the installed diaphragm and seals are compatible with the process medium and cleaning chemicals. Compare actual pressure and temperature with the manufacturer’s specified limits.
Step 5: Repair and Test the Valve
Replace damaged components with manufacturer-approved parts. Reassemble the valve according to the correct procedure, then perform the specified leak and functional tests before restoring the system to service.
For pharmaceutical and other validated hygienic processes, follow the applicable cleaning, inspection, documentation, and requalification procedures before releasing the equipment for production.
Preventive maintenance can reduce unplanned downtime and help extend diaphragm service life.
Inspect diaphragms regularly: Look for cracks, deformation, swelling, hardening, and other signs of wear. Set inspection intervals according to service conditions and manufacturer recommendations.
Use compatible materials: Verify diaphragm and gasket compatibility with process fluids, cleaning agents, and operating temperatures.
Follow proper installation procedures: Use the correct replacement parts and follow the specified assembly sequence and tightening requirements.
Monitor operating conditions: Avoid exceeding rated pressure and temperature limits, and investigate repeated pressure surges or abnormal operating behavior.
Maintain effective cleaning procedures: Use validated or otherwise appropriate cleaning methods for the application without exposing the valve to incompatible chemicals or conditions.
Keep maintenance records: Record leakage incidents, replacement dates, operating conditions, and identified failure causes to help detect recurring problems.
A preventive maintenance program should reflect the valve’s operating frequency, process conditions, hygiene requirements, and the consequences of a potential failure.
Replacing individual components is often sufficient when the valve body and operating mechanism remain in good condition. However, complete valve replacement may be appropriate when the body is significantly corroded, sealing surfaces are irreparably damaged, the valve repeatedly leaks despite correct repairs, or the existing design cannot meet the required process conditions.
Replacement may also be necessary when the valve lacks the required hygienic features, documentation, or material compatibility for the application.
Before deciding, evaluate the cost of repair, spare-part availability, expected remaining service life, and the risk of production interruption. A qualified valve manufacturer can help determine whether component replacement or a complete valve upgrade is more appropriate.
Sanitary diaphragm valve leakage can result from diaphragm wear, material incompatibility, damaged sealing surfaces, improper installation, excessive pressure or temperature, faulty connections, or incorrect operation. Effective troubleshooting begins with identifying the leakage location and inspecting the components associated with the failure.
For long-term reliability, users should select compatible diaphragm materials, operate valves within their specified limits, follow correct installation and cleaning procedures, and replace worn components when necessary.
Working with an experienced sanitary diaphragm valve manufacturer can also help ensure that the valve’s materials, design, and operating specifications match the requirements of the application, supporting reliable sealing and hygienic process performance.
1. What causes a sanitary diaphragm valve to leak?
Common causes include a worn or damaged diaphragm, incorrect diaphragm material, contamination on the sealing surface, improper installation, excessive pressure or temperature, and damaged gaskets. Identifying the exact leakage location helps determine the appropriate repair.
2. How do I fix a leaking sanitary diaphragm valve?
First, determine whether the leakage is internal or external. Safely isolate and depressurize the system, inspect the diaphragm and relevant sealing components, and replace damaged parts with compatible replacements. Reassemble the valve according to the manufacturer’s instructions and perform the required leak tests before returning it to service.
3. How can I tell if a sanitary diaphragm valve diaphragm is damaged?
Common signs include visible cracks, tears, swelling, hardening, deformation, and recurring leakage. A diaphragm may also lose its sealing performance without obvious external damage, so inspection and replacement should follow the manufacturer’s recommendations.
4. Can the wrong diaphragm material cause valve leakage?
Yes. An incompatible diaphragm material may deteriorate, swell, harden, or lose flexibility when exposed to certain process fluids or cleaning chemicals. Select a diaphragm based on chemical compatibility, operating temperature, pressure, and cleaning requirements.
5. How often should a sanitary diaphragm valve diaphragm be replaced?
There is no universal replacement interval. Service life depends on operating frequency, fluid compatibility, temperature, pressure, and cleaning cycles. Regular inspections, maintenance records, and manufacturer recommendations help determine when replacement is necessary.

STAINLESS STEEL&GENCEL;
Privacy Policy | SiteMap
Copyright GENCEL STAINLESS STEEL CO.,LIMITED
 Optimized by Seraphinite Accelerator