- Whatsapp: 8613738300923
- Email: [email protected]

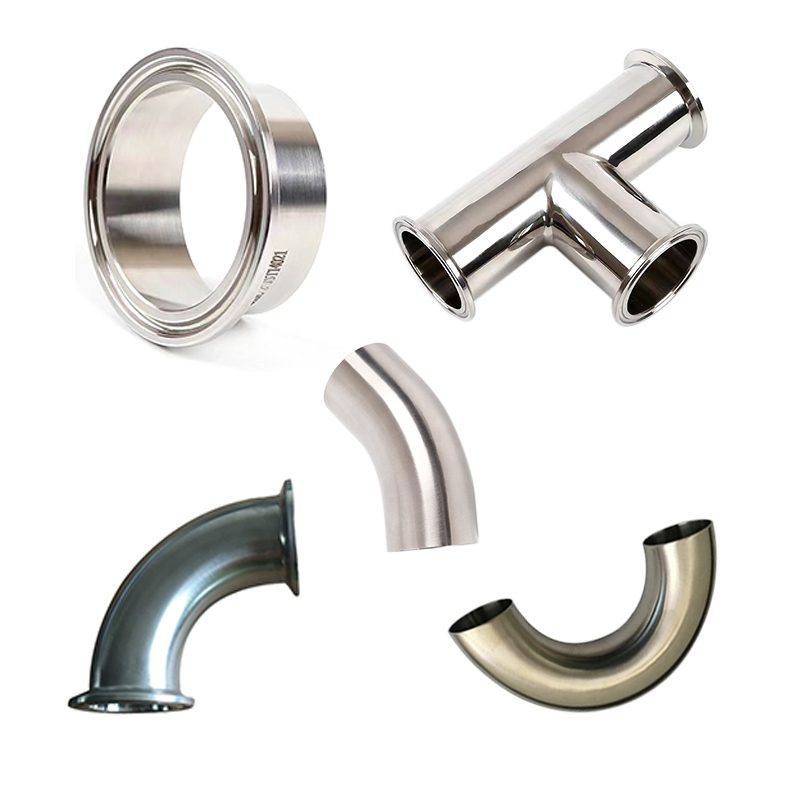
Proper installation is the foundation of any reliable hygienic system. A perfectly designed sanitary pipe fitting will fail prematurely if not installed correctly. This step-by-step guide covers the essential techniques for creating leak-free connections, ensuring your system maintains product purity and operates efficiently from day one.
Before you cut or clamp anything, thorough preparation prevents the most common installation errors. This phase is not just about gathering tools; it’s about ensuring the components themselves are ready for a sterile environment. Begin by inspecting all fittings and pipes. Even new components from a reputable GENCEL Stainless Steel Manufacturer should be checked for shipping damage or debris.
Next, verify that all materials are compatible. Check that the grade of stainless steel—whether 304 or 316L—matches your system specifications and that gaskets are made from the correct material (like EPDM or Viton) for your process temperatures and fluids. Finally, ensure your workspace is clean. Contaminants introduced during installation can compromise the entire system later.

Following a structured process ensures consistency and reliability. The table below outlines the critical stages of installing a typical sanitary pipe fitting using tri-clamp connections, which are the industry standard.
| Step | Action | Critical Checkpoint |
|---|---|---|
| 1. Cutting | Cut pipe squarely using a clean, sharp tube cutter or saw. | Ensure the cut is perfectly perpendicular to the pipe axis. Deburr thoroughly. |
| 2. Fit-Up & Welding | Insert the ferrule and weld using orbital welding (preferred) for a smooth, consistent bead. | The weld must be full-penetration with no interior crevices. Purge with inert gas. |
| 3. Component Alignment | Align the two ferrules (one on pipe, one on equipment/another pipe) perfectly. | Faces must be parallel and centered. Misalignment stresses the gasket. |
| 4. Gasket Placement | Place a clean, undamaged gasket centrally between the two ferrule faces. | The gasket must be the correct size and material. Do not use lubricants to hold it. |
| 5. Clamping | Position the clamp over the ferrules and gasket, then tighten evenly. | Tighten in a criss-cross pattern to the manufacturer’s recommended torque. |
For permanent connections, the weld quality dictates the system’s longevity and cleanability. Orbital welding is the gold standard for sanitary applications, as it produces a repeatable, high-quality weld with a smooth internal surface. If you are welding ferrules onto pipes, inert gas purging (usually argon) is non-negotiable. It prevents oxidation on the inside of the weld, which can create rough spots where bacteria thrive.
For the mechanical connection, the tri-clamp assembly is where precision matters. When you place the gasket, it should sit flush without overhanging. As you tighten the clamp, do so evenly. An over-tightened clamp can extrude the gasket into the product path or crack a ferrule, while an under-tightened one will leak. This balance is crucial for a leak-free connection.
Installation is not complete without verification. Once all connections are made, a systematic check ensures everything is ready for operation. First, conduct a visual inspection of all clamps to ensure they are seated evenly and that there are no gaps.
Next, perform a pressure test. A hydrostatic test is excellent for new sections of pipe to verify overall strength. For final integrity, especially in systems that cannot tolerate moisture, a pressure decay test using air or nitrogen can detect micro-leaks at gaskets and welds. Catching a minor leak now prevents a major contamination event later. Remember, a system built with high-quality components from a licensed manufacturer, like those from GENCEL—holder of a Pressure Piping Components License—provides a reliable foundation for these tests to pass.
Q1: What is the most common mistake when installing sanitary fittings?
The most common mistake is misalignment of the ferrules before clamping. Even a slight angle can prevent the gasket from sealing properly, leading to leaks and creating a crevice for bacteria.
Q2: Do I need special tools to install sanitary pipe fittings?
Yes, for best results. A precision tube cutter, a deburring tool, and a torque wrench for clamps are essential. For welding, orbital welding equipment is highly recommended for creating sanitary, repeatable welds.
Q3: Can I use Teflon tape on the threads of sanitary fittings?
No. Standard sanitary systems like tri-clamp do not use threaded connections in product zones. They rely on a gasket compressed between smooth ferrules. If you have a threaded connection, it is likely not a sanitary design.
Q4: How tight should a tri-clamp be?
It should be tightened to the manufacturer’s specified torque, often between 40-60 inch-pounds for smaller sizes. The goal is to compress the gasket just enough to create a seal without deforming it or the ferrules.
Q5: Why is GENCEL a reliable choice for my project?
As a manufacturer with over 15 years of experience and a licensed producer of Pressure Piping Components, GENCEL provides fittings trusted in demanding industries like petrochemicals and pharmaceuticals globally, ensuring compliance and durability.
Installing sanitary pipe fittings correctly is a skill that protects product quality and ensures operational safety. By following this guide—from meticulous preparation and precise welding to careful clamping and final testing—you can build a system that performs flawlessly. Avoid shortcuts; invest time in proper technique and choose components you can trust. For precision-engineered fittings and flanges that meet international standards, explore the range at GENCEL Stainless Steel Manufacturer and build your system with confidence.

STAINLESS STEEL&GENCEL;
Privacy Policy | SiteMap
Copyright GENCEL STAINLESS STEEL CO.,LIMITED
 Optimized by Seraphinite Accelerator